


[ad_1]
This post may contain affiliate links. For more information, please see our disclosure policy.
DIY floor pillows add comfort and style to your home. Follow this easy sewing tutorial to create cozy, versatile seating for any room.

It’s 107 degrees here in Texas, so I’ve let my normally outdoor dog, Stewart, inside to escape the heat.
I’m vacuuming nonstop with all his shedding, and my kids playing on his bed only worsens the dog hair problem.
To solve this, I decided to sew their own “dog” beds—cozy floor pillows just for them!
This easy pillow project is perfect for keeping everyone comfy and hair-free.
Jump to:
Supply List
Cut out all your fabric pieces.
- 2 – 19×19-inch squares (top and bottom)
- 3 – 19×7-inch rectangles (3 sides)
- 2 – 19×44-inch rectangles (zipper side)
- 4 – 3×9-inch rectangles (handles)

A cutting mat and rotary cutter make cutting the fabric quick and easy, but these pieces can also be cut with scissors.
Handles
Use the standard ⅝ inch seam allowance unless otherwise stated.
This cushion will have two handles, so all the steps will be done twice.
Pin the raw piping edges to the right side of one of the 3×9-inch rectangles. Do this on both long edges.
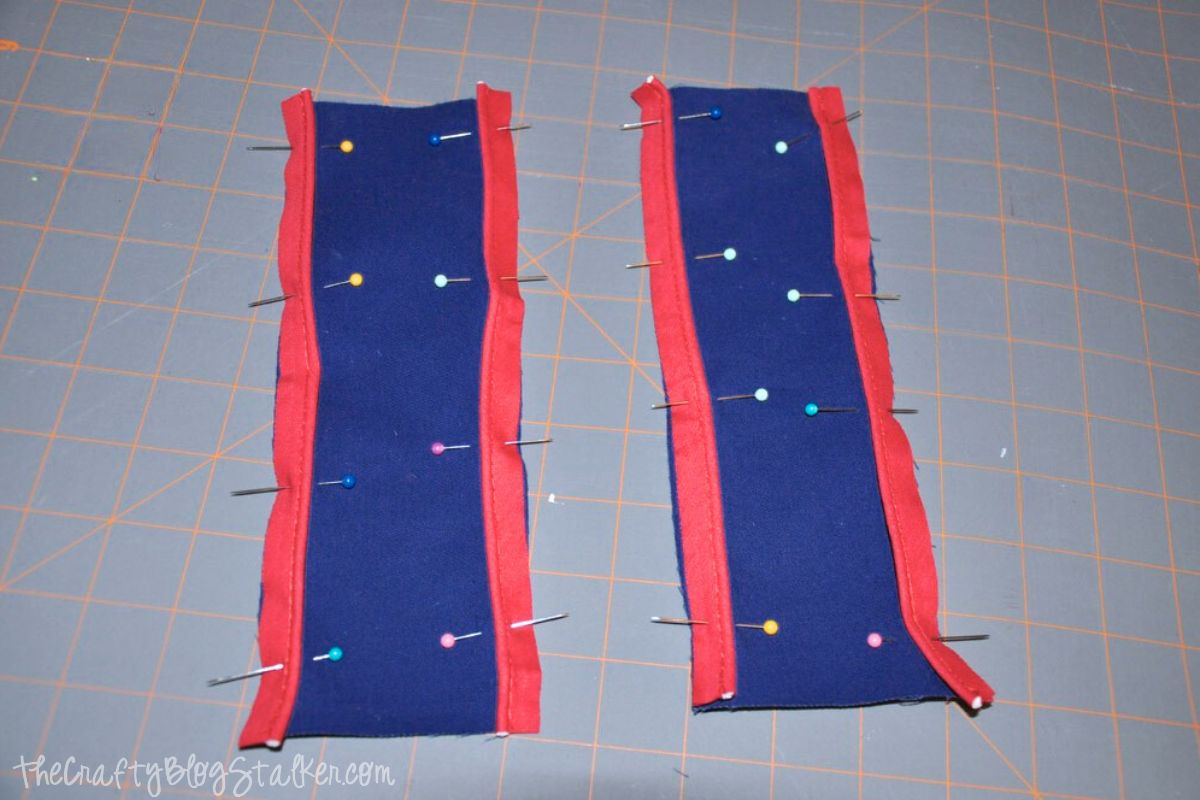
Using the zipper foot, sew along the piping.
Place another 3 x 9 rectangle on top with right sides together and pin.
Turn the pieces over so you sew on the back of the piece with the piping.
Sew along the seam from the piping.

Turn the tube right side out, fold in the edges, and stitch closed.

Next, attach the handles to the sides of the floor pillow.
Center, the handle on one of the 19×7-inch pieces. Stitch a box with an X in it, double stitch to make sure it is sturdy

Do this again on another side piece and set those aside.
Zipper
On the two 19 x 4 inch pieces, attach the zipper.
Here is an excellent tutorial on Installing a Basic Zipper.
Piping
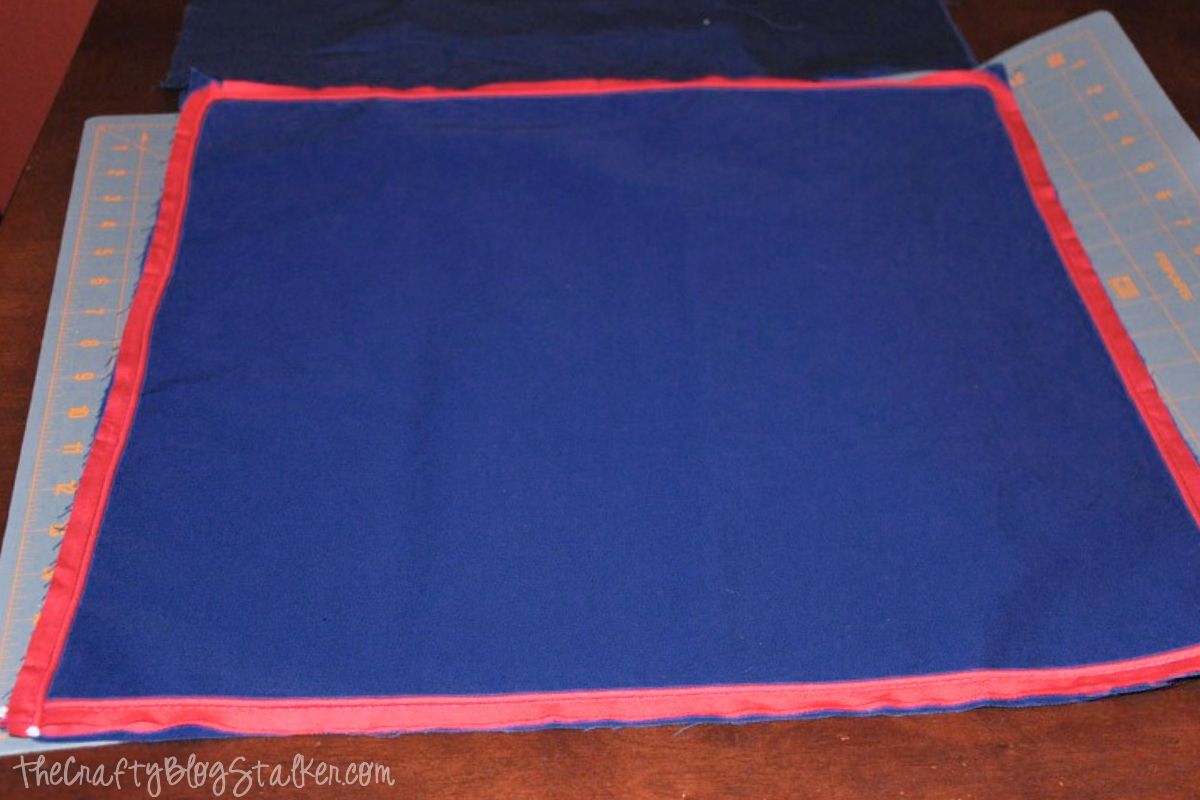
To add the piping around the edges, pin it around both 19×19-inch squares on the right side of the fabric.
Match up the raw edges of the fabric, just like on the handles. Then sew it down using the zipper foot.
Do this to both the top and bottom pieces
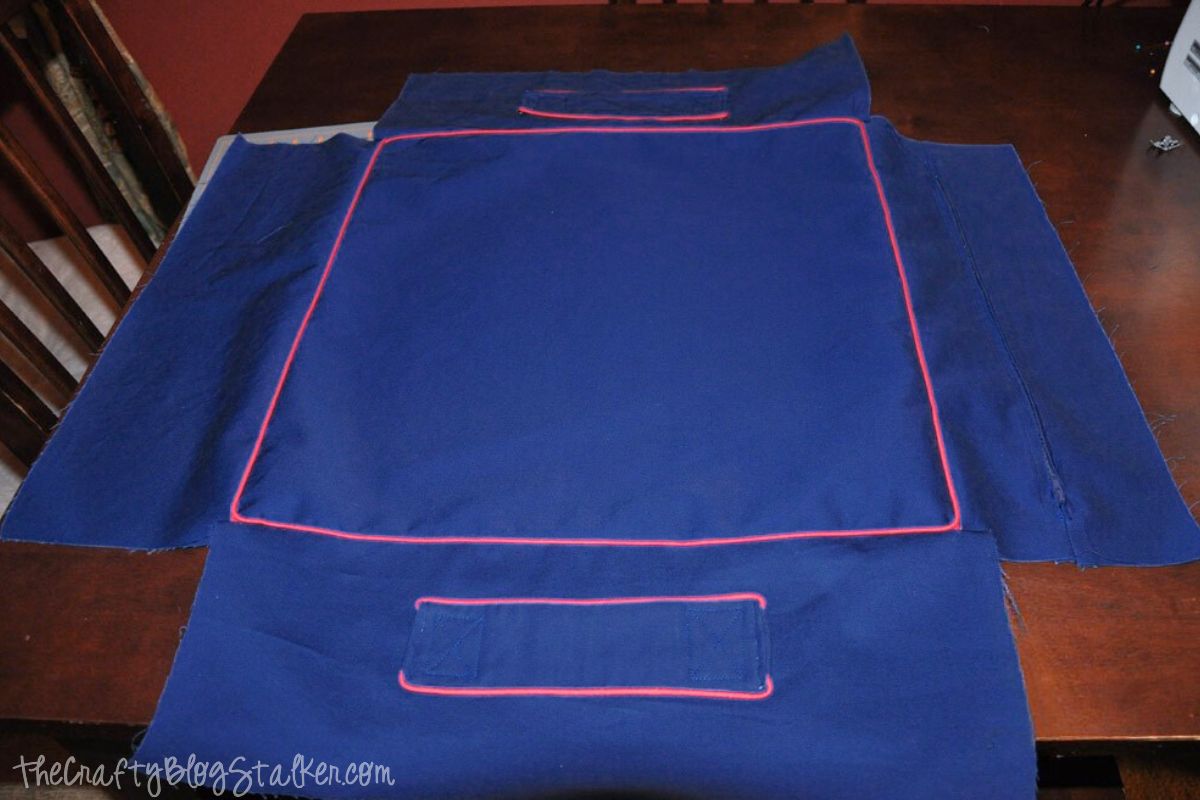
Sides
Attach the side panels to the top panel.
Make sure the two sides with the handles to are opposite each other.
One at a time, line up the side panel with the right sides together and sew along the stitching where you attached the piping.
This ensures that your piping has a very clean edge.

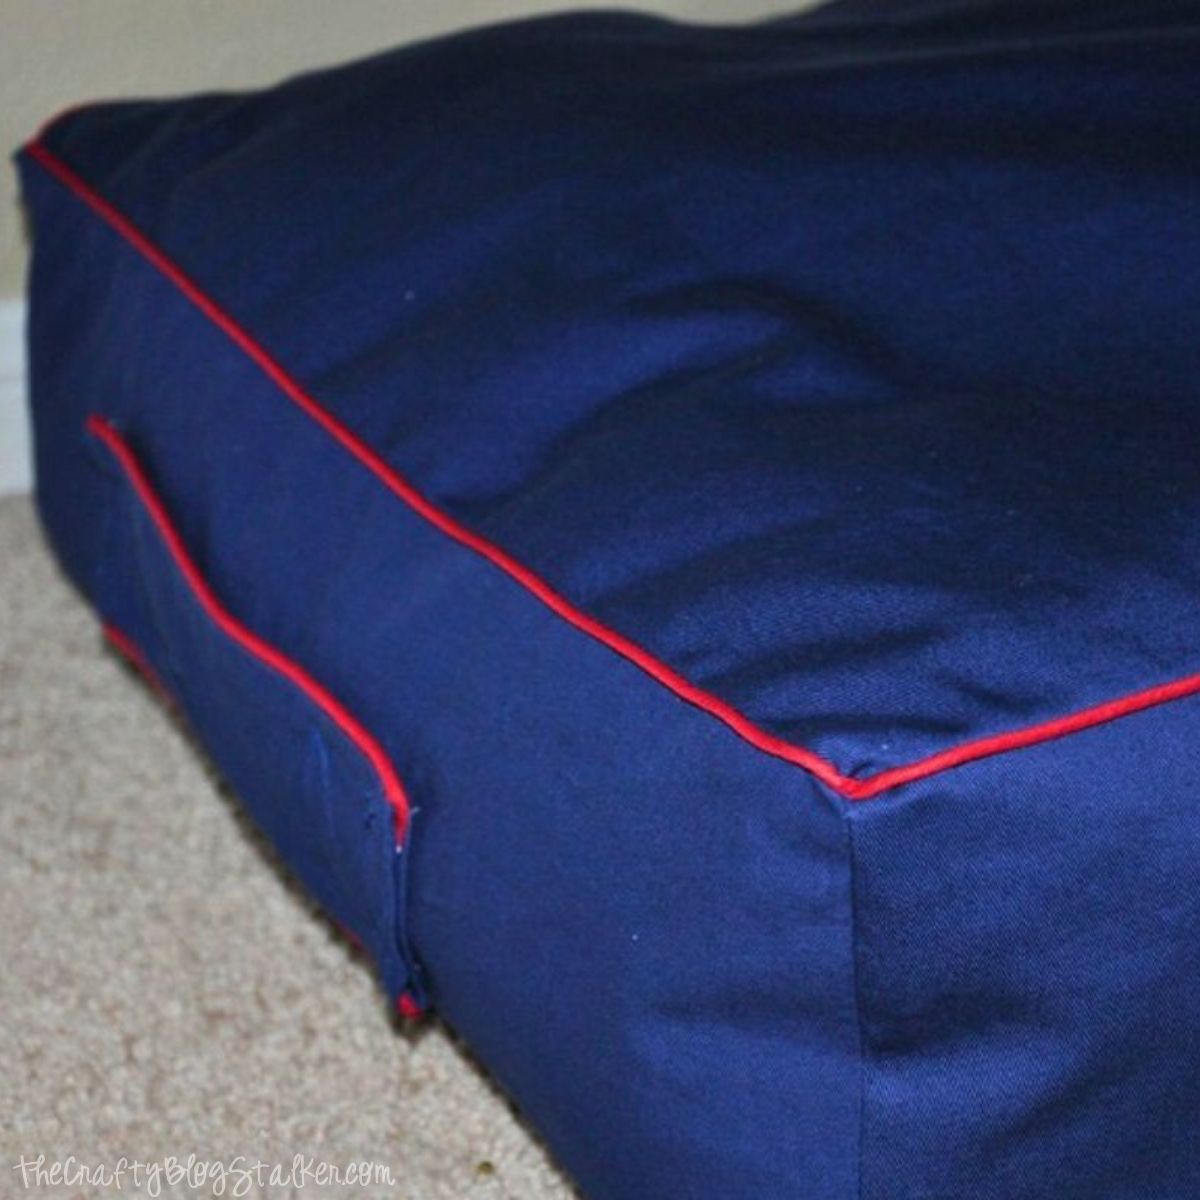
Once all sides have been sewn, they should look like this.
Corners
Match up the short sides and sew them up.
Don’t sew onto the top panel but get close enough to close it up.
This is what it looks like.

Bottom
Unzip the side with the zipper.
Take the 19 x 19 bottom side, line up the edges, and sew along the stitch line from the piping.
When you are done, you will have a box!

Pillow Form
To make the pillow insert, cut all of the same pieces, except I did four identical side panels since I didn’t need a zipper.
Follow the instructions above, although there is no need to worry about piping.
Don’t forget to leave one edge up to turn and stuff.
Sew up your hole, and now you have a pillow insert.

Insert the Pillow and Enjoy!
These pillows are perfect for sitting and playing.
Kids can sit on them, fly on them, drive them, drag them, and likely throw them!
My son already loves his and drags it all over the house.

More Sewing Tutorials
Have more fabric than you know what to do with? Here are some ideas!
[ad_2]
Source link